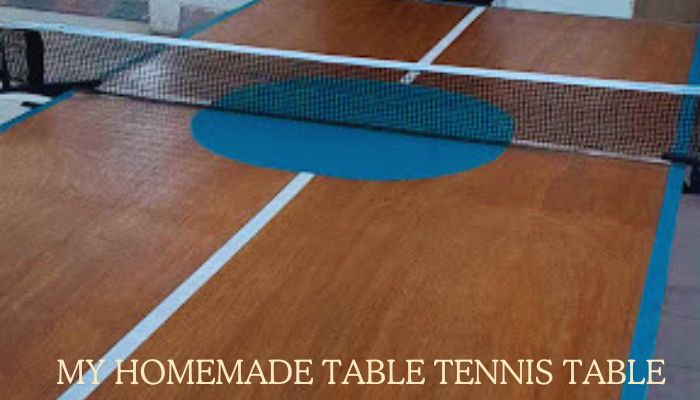
DIY Guide: How to Color Your Homemade Plywood Table Tennis Table Like a Pro
( If you purchase through our sponsored links, we may receive a small commission at no extra cost to you )
Coloring your plywood table tennis table is a great idea for several reasons. Not only does it add a personal touch to your table, but it also helps to protect the surface from wear and tear. Additionally, coloring your table tennis table can make it more visually appealing and can even help to match it with the decor of your room.
There are several benefits to coloring your table tennis table. Firstly, it helps to protect the surface from scratches, dents, and other damage that can occur during gameplay. By adding a layer of color, you are essentially adding an extra layer of protection to the surface of the table. This can help to extend the lifespan of your table and keep it looking new for longer.
Secondly, coloring your table tennis table allows you to personalize it and make it unique to you. Whether you choose a bold and vibrant color or a more subtle and neutral shade, the choice is yours. You can even get creative and add designs or patterns to make your table truly one-of-a-kind.
Key Takeaways
- Coloring your plywood table tennis table can give it a unique and personalized look.
- Choosing the right color for your table depends on your personal preference and the overall aesthetic of your space.
- Preparing your table for coloring involves cleaning and sanding the surface to ensure a smooth finish.
- Applying a base coat and top coat will help protect your table and create a vibrant color.
- Adding a design to your table can be a fun and creative way to make it stand out.
Choosing the Right Color for Your Table Tennis Table
When choosing a color for your table tennis table, there are several factors to consider. Firstly, think about the overall aesthetic of the room where the table will be placed. Consider the colors of the walls, furniture, and other decor items in the room. You want to choose a color that will complement the existing color scheme and create a cohesive look.
Popular color options for table tennis tables include shades of blue, green, red, and black. These colors are often associated with traditional table tennis tables and can give your table a classic look. However, don’t be afraid to think outside the box and choose a color that is more unique or unexpected.
To match the color of your table tennis table with your room decor, consider using color swatches or paint samples to compare different shades. This will allow you to see how the color will look in the room before committing to it. Additionally, you can also consider using accent colors or patterns on the table to tie it in with other elements in the room.
Preparing Your Table Tennis Table for Coloring
Before you can start coloring your table tennis table, it’s important to properly prepare the surface. This includes cleaning the table, removing any existing finish, and filling any cracks or holes in the table.
Start by thoroughly cleaning the table with a mild detergent and water. Use a soft cloth or sponge to gently scrub away any dirt or grime. Rinse the table with clean water and allow it to dry completely before moving on to the next step.
Next, if there is any existing finish on the table, such as varnish or paint, it will need to be removed. This can be done using a paint stripper or sandpaper. Follow the instructions on the paint stripper or use sandpaper to gently remove the finish from the surface of the table. Be sure to wear protective gloves and goggles when using a paint stripper.
Once the finish has been removed, inspect the table for any cracks or holes. Use wood filler or putty to fill in these imperfections. Allow the filler to dry completely and then sand it down until it is smooth and level with the rest of the table.
Sanding Your Table Tennis Table for a Smooth Finish
| Step | Description |
|---|---|
| 1 | Clean the table tennis table with a damp cloth to remove any dirt or debris. |
| 2 | Use a fine-grit sandpaper to sand the table surface in a circular motion. |
| 3 | Wipe the table with a clean, dry cloth to remove any dust or debris. |
| 4 | Repeat step 2 and 3 with a medium-grit sandpaper. |
| 5 | Finish with a fine-grit sandpaper to achieve a smooth finish. |
| 6 | Wipe the table with a clean, dry cloth to remove any remaining dust or debris. |
Sanding your table tennis table is an important step in achieving a smooth and even finish. It helps to remove any rough patches or imperfections on the surface of the table and creates a smooth canvas for painting.
To sand your table tennis table, you will need a few tools including sandpaper, a sanding block or electric sander, and a dust mask. Start by attaching a piece of coarse-grit sandpaper to your sanding block or electric sander. Begin sanding the surface of the table in a circular motion, applying even pressure. Be sure to sand the entire surface of the table, including the edges and corners.
Once you have sanded the table with the coarse-grit sandpaper, switch to a finer-grit sandpaper and repeat the process. This will help to smooth out any remaining rough patches and create a more polished finish. Be sure to wear a dust mask while sanding to protect yourself from inhaling any dust particles.
After sanding, wipe down the table with a damp cloth to remove any dust or debris. Allow the table to dry completely before moving on to the next step.
Applying the Base Coat to Your Table Tennis Table
Applying a base coat to your table tennis table is an important step in achieving a professional-looking finish. The base coat helps to create a smooth and even surface for the top coat of paint.
There are several types of base coats available, including primer and sealer. Primer is typically used on bare wood surfaces to help seal the wood and create a smooth surface for painting. Sealer, on the other hand, is used to seal porous surfaces and prevent the paint from soaking into the wood.
To apply a base coat to your table tennis table, start by stirring the paint thoroughly to ensure an even consistency. Use a paintbrush or roller to apply an even layer of base coat to the entire surface of the table. Be sure to follow the manufacturer’s instructions for drying time between coats.
Once the base coat has dried, lightly sand the surface of the table with fine-grit sandpaper. This will help to smooth out any brush strokes or imperfections in the base coat. Wipe down the table with a damp cloth to remove any dust or debris before moving on to the next step.
Adding the Top Coat to Your Table Tennis Table

After applying the base coat, it’s time to add the top coat to your table tennis table. The top coat is what will give your table its final color and finish.
There are several types of top coats available, including acrylic paint, enamel paint, and polyurethane. Acrylic paint is a popular choice for table tennis tables as it is durable and easy to work with. Enamel paint is another option, but it can be more difficult to apply and may require multiple coats for full coverage. Polyurethane is a clear top coat that can be applied over the base coat to protect the surface of the table.
To apply the top coat, start by stirring the paint thoroughly to ensure an even consistency. Use a paintbrush or roller to apply an even layer of top coat to the entire surface of the table. Be sure to follow the manufacturer’s instructions for drying time between coats.
Once the top coat has dried, lightly sand the surface of the table with fine-grit sandpaper. This will help to smooth out any brush strokes or imperfections in the top coat. Wipe down the table with a damp cloth to remove any dust or debris before moving on to the next step.
Creating a Design on Your Table Tennis Table
If you want to take your colored table tennis table to the next level, consider adding a design or pattern to it. This can be a fun and creative way to personalize your table and make it truly unique.
There are several ideas for designs on your table tennis table, depending on your personal style and preferences. You could create a simple geometric pattern using painter’s tape and different colors of paint. Alternatively, you could use stencils or freehand painting to create a more intricate design.
To create a design on your table tennis table, you will need a few tools including painter’s tape, stencils (if desired), and different colors of paint. Start by applying painter’s tape to the areas where you want to create a design. This will help to create clean and crisp lines.
If you are using stencils, place the stencil on the table and secure it with painter’s tape. Use a small paintbrush or sponge to apply the paint to the stencil, being careful not to go outside the lines. If you are freehand painting, use a small paintbrush to carefully paint your design onto the table.
Allow the paint to dry completely before removing the painter’s tape or stencil. Once the paint is dry, you can add additional coats of paint or touch up any areas that need it. Once you are satisfied with the design, move on to the next step.
Protecting Your Table Tennis Table with a Clear Coat
After you have finished coloring and designing your table tennis table, it’s important to protect it with a clear coat. The clear coat helps to seal in the color and design and provides an extra layer of protection against scratches and other damage.
There are several types of clear coats available, including polyurethane and varnish. Polyurethane is a popular choice as it is durable and provides a glossy finish. Varnish is another option, but it can be more difficult to apply and may require multiple coats for full coverage.
To apply a clear coat to your table tennis table, start by stirring the clear coat thoroughly to ensure an even consistency. Use a paintbrush or roller to apply an even layer of clear coat to the entire surface of the table. Be sure to follow the manufacturer’s instructions for drying time between coats.
Once the clear coat has dried, lightly sand the surface of the table with fine-grit sandpaper. This will help to smooth out any brush strokes or imperfections in the clear coat. Wipe down the table with a damp cloth to remove any dust or debris before moving on to the next step.
Maintaining Your Colored Table Tennis Table
To keep your colored table tennis table looking its best, it’s important to properly maintain it. This includes regular cleaning and addressing any scratches or chips in the color.
To clean your table tennis table, use a mild detergent and water to gently scrub away any dirt or grime. Avoid using harsh chemicals or abrasive cleaners as these can damage the surface of the table. Rinse the table with clean water and dry it thoroughly before using.
If you notice any scratches or chips in the color, you can touch them up using a small paintbrush and matching paint. Simply apply a small amount of paint to the affected area and allow it to dry completely. Once dry, lightly sand the area with fine-grit sandpaper to blend it in with the surrounding color.
It’s also a good idea to periodically apply a fresh coat of clear coat to your table tennis table to help protect the surface and keep it looking new. Follow the same steps as before, applying an even layer of clear coat and allowing it to dry completely.
Conclusion and Final Tips for a Professional Finish
In conclusion, coloring your plywood table tennis table is a great way to add a personal touch and protect the surface from wear and tear. By choosing the right color, properly preparing the table, and following the steps for sanding, applying base coats and top coats, creating a design, and adding a clear coat, you can achieve a professional-looking finish.
Some final tips for achieving a professional finish include taking your time and being patient throughout the process. Rushing or skipping steps can result in an uneven or unsatisfactory finish. It’s also important to use high-quality materials and tools for the best results.
Don’t be afraid to get creative with your design and have fun with the process. Coloring your table tennis table is a great way to express your personal style and make your table truly unique. So go ahead, give it a try, and enjoy your newly colored table tennis table!
If you’re looking to add a pop of color to your homemade plywood table tennis table, check out this helpful article on how to paint and customize your table. From choosing the right type of paint to applying a smooth and durable finish, this guide will walk you through the step-by-step process. Whether you want a vibrant design or a simple monochrome look, this article has got you covered. So grab your paintbrush and get ready to transform your table into a work of art! (source)
FAQs
What materials do I need to color my homemade plyboard table tennis table?
To color your homemade plyboard table tennis table, you will need sandpaper, primer, paint, paintbrushes, and a clear coat.
What type of paint should I use?
You should use a paint that is specifically designed for use on wood surfaces. Acrylic or latex paint is a good choice.
Do I need to sand the table before painting?
Yes, you should sand the table before painting to ensure that the surface is smooth and free of any imperfections.
How many coats of paint should I apply?
You should apply at least two coats of paint to ensure that the color is even and the surface is fully covered.
Do I need to apply a clear coat?
Yes, applying a clear coat will help protect the surface of the table and ensure that the paint does not chip or peel.
How long does it take for the paint to dry?
The drying time will depend on the type of paint you use and the temperature and humidity of your workspace. Generally, it can take anywhere from a few hours to a full day for the paint to fully dry.
Can I use a spray paint instead of a brush?
Yes, you can use a spray paint instead of a brush. However, be sure to follow the manufacturer’s instructions and use the spray paint in a well-ventilated area.
How do I maintain the color of my table tennis table?
To maintain the color of your table tennis table, avoid exposing it to direct sunlight for extended periods of time and clean it regularly with a damp cloth.

